The New ArduinoJson Assistant
If you visited arduinojson.org over the past four months, you probably witnessed the slow and progressive transformation of the ArduinoJson Assistant. In this article, we’ll see all the features of this new version.
The old Assistant was really confusing because it presented everything at the same time, so I decided to split the original page into four distinct steps, like a software wizard. Let’s see them one by one.
Step 1: configuration
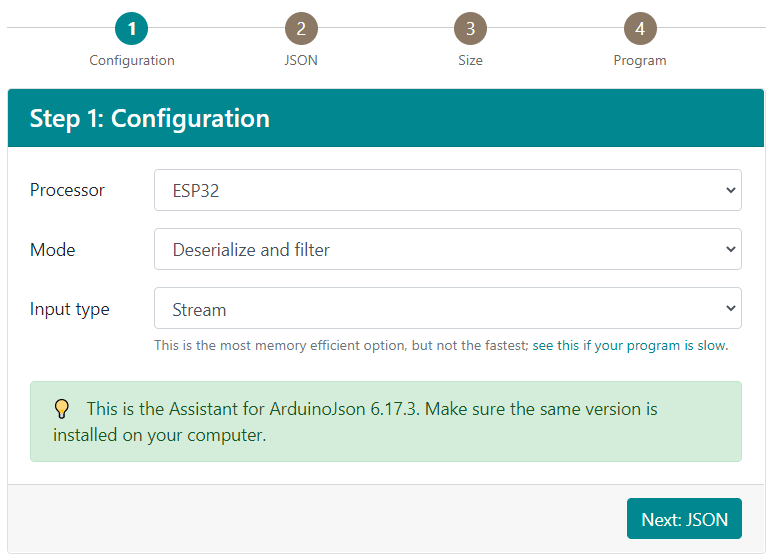
Platform awareness
The first thing you’ll notice is a new setting where you need to specify the type of hardware you use.
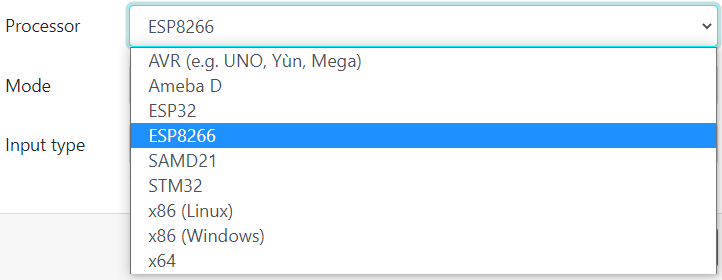
This setting allows the Assistant to adapt the results to your platform.
Note that I collect anonymous usage statistics on this value; here are the results so far:
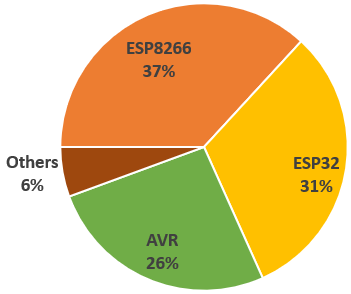
As you can see, ESP8266 and ESP32 are largely dominant, but AVR still represents a large part of our users. This information is crucial to make the right design decisions for future versions of the library.
Mode selection
The old version of the Assistant mixed serialization and deserialization information in a very confusing manner; that’s why I decided to make a clear separation in the new revision. Before using the Assistant, you must now tell what you want to do: serialize or deserialize.

As you can see, in addition to Serialize and Deserialize, there is also a third Deserialize and filter mode that allows you to use the filtering feature of ArduinoJson 6.15.
For this value too, I collect anonymous usage information to guide future design decisions. Here are the results so far:
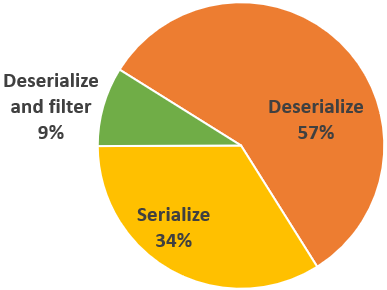
Honestly, I’m quite disappointed that so few people use the filtering feature; hopefully, its popularity will grow over time.
Input/output type selection
As you should already know, ArduinoJson’s parser’s behavior depends on the type of input. If the input is read-only, the parser copies the relevant part in the JsonDocument (this is the “classic” mode), but if the input is writeable (i.e., a char pointer), it stores pointers to the input buffer (this is the “zero-copy” mode). Since this deserialization behavior changes the size of the JsonDocument, the Assistant needs to know which type of input you use.
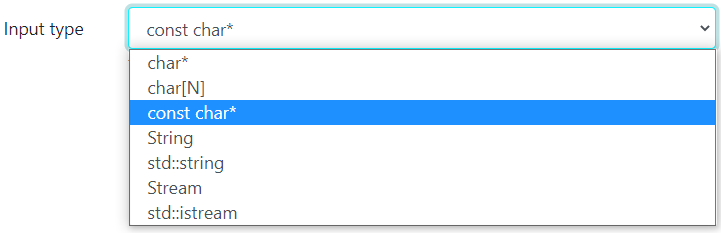
As you’ll see, the Assistant also shows some hints about the selected type.

This setting also affects the program generated in step 4.
Step 2: JSON
In this second step, you need to specify the JSON document you want to serialize or deserialize. In the old Assistant, this was pretty much all you could configure.
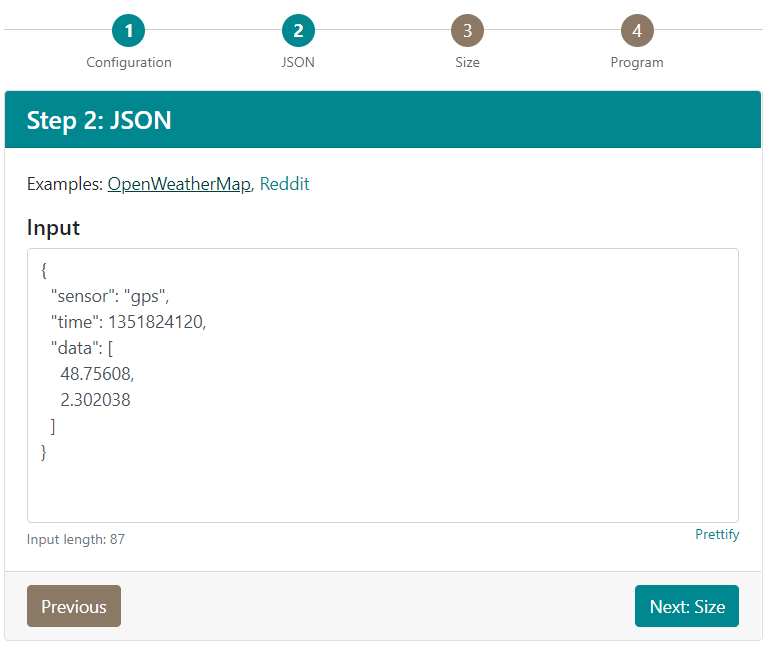
Notice the small “prettify” link at the bottom that, when clicked, automatically formats the JSON document.
One could think nothing much happens on this page, but this isn’t true: the Assistant analyzes the JSON document to provide some useful hints.

As you can see, it warns about double-precision floating-point values, 64-bits integers, and nesting limit.
When you select the mode Deserialize and Filter, this page shows three panels instead of one.
As you can see, the left panel is the JSON input. In the center, you can set the filter; and on the right, you’ll see the filtered document. This is a great addition compared to the old version because you can now prototype your filter from your browser.
Lastly, at the top of the page, you’ll see two links to load sample JSON documents; these are snapshots of OpenWeatherMap and Reddit responses, as covered in the case studies of Mastering ArduinoJson.
Step 3: Size
The table
In the third step, you’ll see a table showing the size of the JsonDocument. The size is composed of the data structures and the strings.
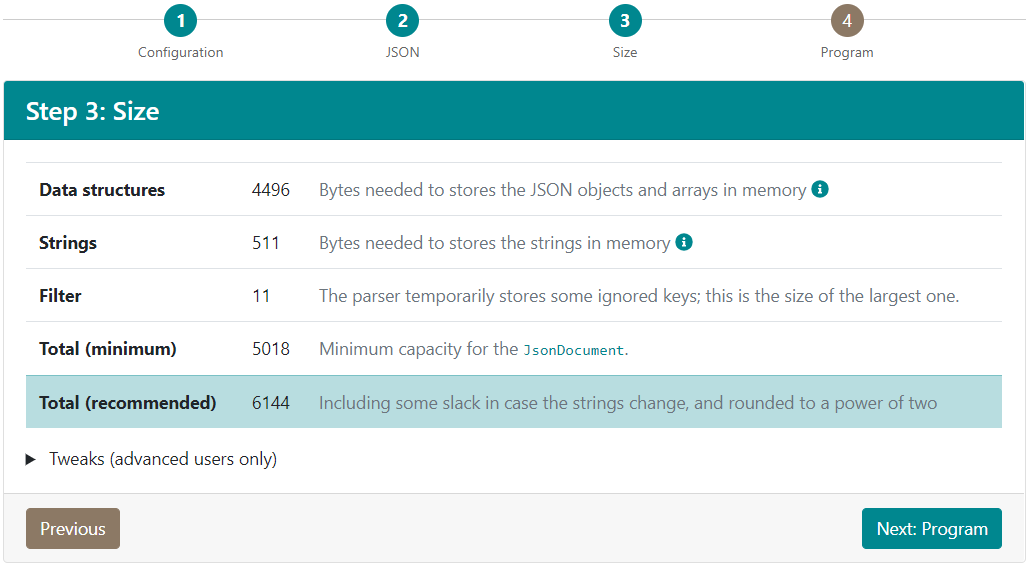
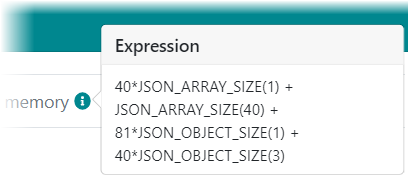
This is where the old Assistant gave you a long expression to compute the document’s capacity; instead, the new version just shows the size for the platform you selected in step 1. If you want to see the expression as before, you need to click on the right:
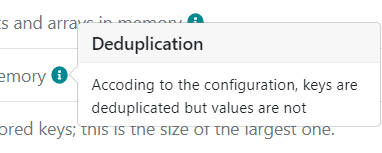
Depending on your settings, the strings’ size might be zero, for example, if you use the zero-copy mode. In any case, you can click to get an explanation:
The size of the data structures and the size of the strings are added to get the “minimum” size, which is the capacity of the smallest JsonDocument that can store this document.
Below the “mimimum” size is the “recommended” size, where the Assistant adds some slack to allow variations in the input and rounds the result to a power of two.
Warnings
At this point, the Assistant knows whether the size of the JsonDocument is compatible with the selected microcontroller and will show a relevant warning if needed.

Of course, the amount of RAM available depends on your platforms, but I configured some reasonable limits to detect the most obvious mistakes.
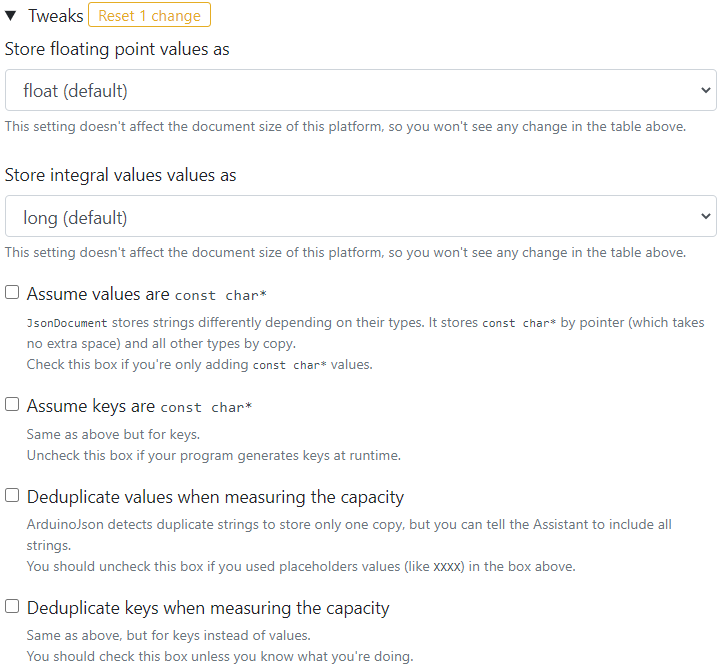
Tweaks
At the bottom of the page, you’ll see an expandable section named “Tweaks.” This section contains various settings that affect the size of the JsonDocument.
Which settings are visible at a given time depends on the Assistant’s configuration.
Among these tweaks, you can configure the storage for floating-point values (float or double) and integral values (long or long long); as you’ll see, these settings don’t always increase the size of the document (it depends on the selected platform).
If you selected the Serialize mode in step 1, you can tell the Assistant how your program will insert keys and string values in the document and whether it needs to duplicate them or not. By default, it assumes that you use string literals for keys and variables for values, so it stores the keys by pointer and the values by copy.
Lastly, you’ll be able to configure how the Assistant handles string deduplication. By default, it deduplicates keys but not values because they could be placeholders, so it’s safer not to deduplicate values. To be clear, the library will always deduplicate strings; these checkboxes only affect the Assistant’s results.
Step 4: Program
On the last page, the Assistant will sketch a sample program that you can use as a starting point for your project.
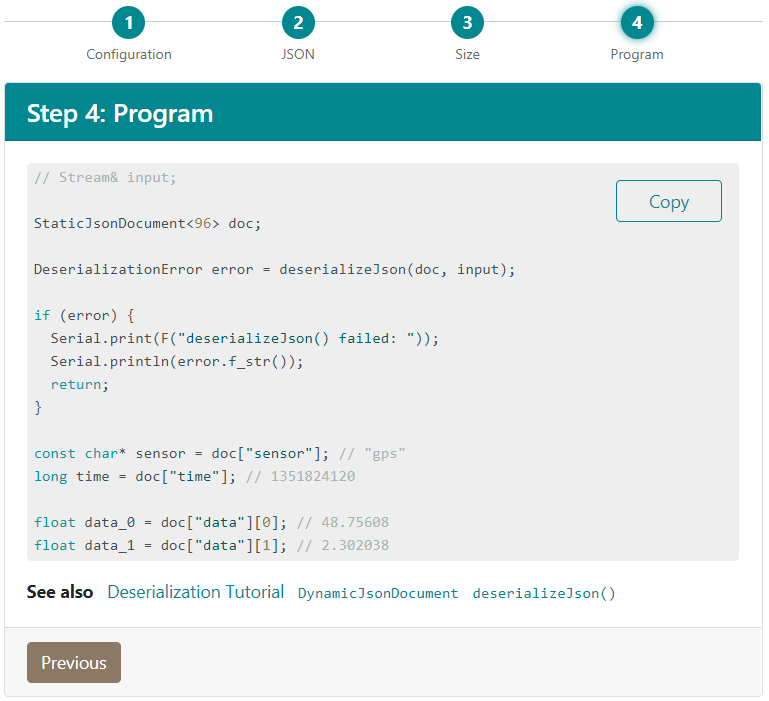
The generated code is very similar to the one from the old Assistant, except that the new one sometimes writes loops. Currently, it detects loops only for some cases, but I believe I’ll be able to support more in the future.
In addition, this page may show one or more warnings to remind you to configure the library appropriately. For example, if on step 3 you selected long long, an alert will tell you to define ARDUINOJSON_USE_LONG_LONG to 1.

Conclusion
One last thing I need to say is that every time you go to the next step, the ArduinoJson Assistant saves the current configuration in your browser’s local storage, so your settings are preserved when you refresh the page.
All these changes have suspended the development of the library, but I think it was worth it. Indeed, with all these hints and warnings, the Assistant should save time for many users.
We haven’t found many bugs so far, but it’s still possible that you find one. If that’s the case, please open an issue on GitHub as you would do for a bug in the library.
As usual, please consider purchasing my book Mastering ArduinoJson to support the project. If you want to provide more permanent support, you can also opt to be a GitHub sponsor. Any financial help allows me to allocate time to improve the library, develop the Assistant, and help users; that’s why your support is crucial for this project’s life.
Thanks a lot for using the new ArduinoJson Assistant, and I’ll see you next time for a new revision of the library.
